


Table of contents
- What is Autoscaling?
- Pre-requisites 🔑
- Task 1: Create an Auto Scaling Group
- Task 2: Test Scaling
- Go to the AWS Management Console and select the Auto Scaling Groups service.
- Select the Auto Scaling Group you just created and click on the "Edit" button.
- Increase the "Desired Capacity" to 3 and click on the "Save" button.
- Wait a few minutes for the new instances to be launched.
- Go to the EC2 Instances service and verify that the new instances have been launched.
Yesterday, we explored how to create an AWS S3 Bucket with Terraform. Today, let's dive into the exciting world of scaling our infrastructure using Terraform.
What is Autoscaling?
Scaling is the process of adding or removing resources to match the changing demands of your application. As your application grows, you will need to add more resources to handle the increased load. And as the load decreases, you can remove the extra resources to save costs.
Terraform makes it easy to scale your infrastructure by providing a declarative way to define your resources. You can define the number of resources you need and Terraform will automatically create or destroy the resources as needed.
Pre-requisites 🔑

Code available @ github.com/gsbarure/day68-90daysofdevops.git
Task 1: Create an Auto Scaling Group
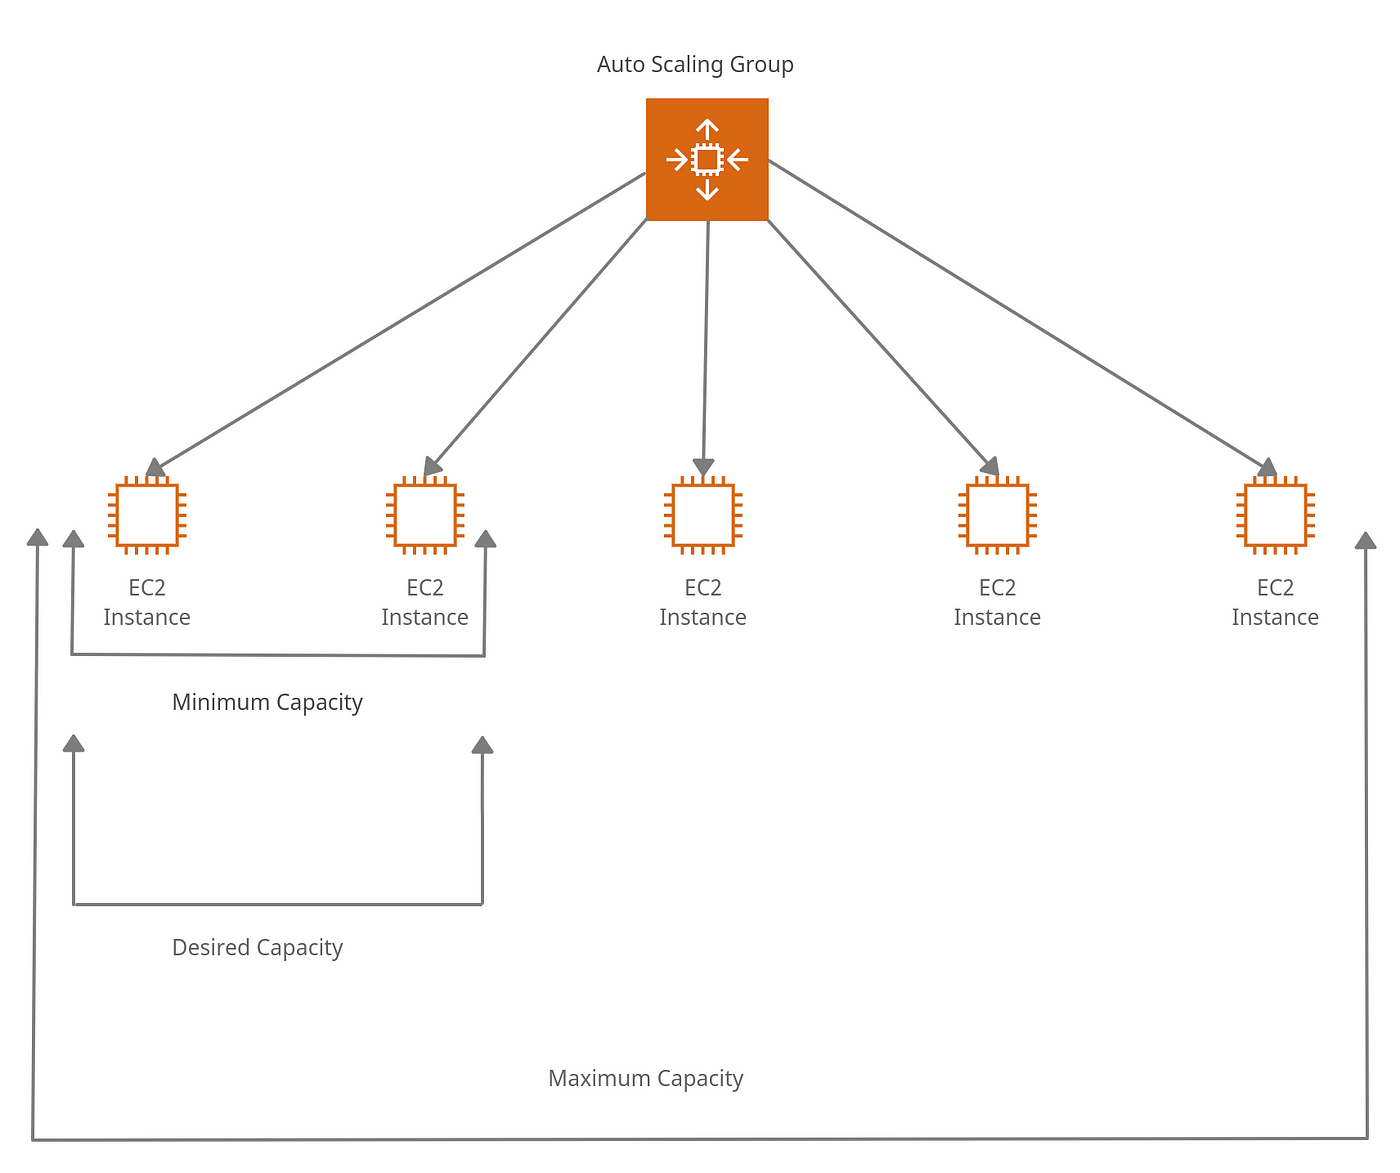
Auto Scaling Groups are used to automatically add or remove EC2 instances based on the current demand. Follow these steps to create an Auto Scaling Group:
- In your main.tf file, add the following code to create an Auto Scaling Group:
resource "aws_launch_configuration" "web_server_as" {
  image_id        = "ami-005f9685cb30f234b"
  instance_type  = "t2.micro"
  security_groups = [aws_security_group.web_server.name]

  user_data = <<-EOF
              #!/bin/bash
              echo "<html><body><h1>You're doing really Great</h1></body></html>" > index.html
              nohup python -m SimpleHTTPServer 80 &
              EOF
}

resource "aws_autoscaling_group" "web_server_asg" {
  name                 = "web-server-asg"
  launch_configuration = aws_launch_configuration.web_server_lc.name
  min_size             = 1
  max_size             = 3
  desired_capacity     = 2
  health_check_type    = "EC2"
  load_balancers       = [aws_elb.web_server_lb.name]
  vpc_zone_identifier  = [aws_subnet.public_subnet_1a.id, aws_subnet.public_subnet_1b.id]
}


terraform plan


Run terraform apply to create the Auto Scaling Group.


Task 2: Test Scaling
Go to the AWS Management Console and select the Auto Scaling Groups service.
Select the Auto Scaling Group you just created and click on the "Edit" button.

Increase the "Desired Capacity" to 3 and click on the "Save" button.
Wait a few minutes for the new instances to be launched.
Go to the EC2 Instances service and verify that the new instances have been launched.


Decrease the "Desired Capacity" to 1 and wait a few minutes for the extra instances to be terminated.
Go to the EC2 Instances service and verify that the extra instances have been terminated.


Congratulations🎊🎉 You have successfully scaled your infrastructure with Terraform.
Happy Learning :)
code availability for above task:github.com/gsbarure/day68-90daysofdevops.git
linkdin:linkedin.com/in/gajanan-barure-7351a4140
Thank you for reading!! Hope you find this helpful.
#day68#90daysofdevops#devopscommunity#